SPC-Bodenbelag mit Steinmuster

stone-pattern-spc-flooring-surface-closeup SPC-Bodenbelag in Steinoptik mit Holzmaserung Detail der Steinmuster-SPC-Bodenbelagstextur Detail der Steinmuster-SPC-Bodenbelagsoberfläche Steinmuster-SPC-Bodenbelag-Marmorstruktur

SPC-Bodenbelag mit Steinmuster

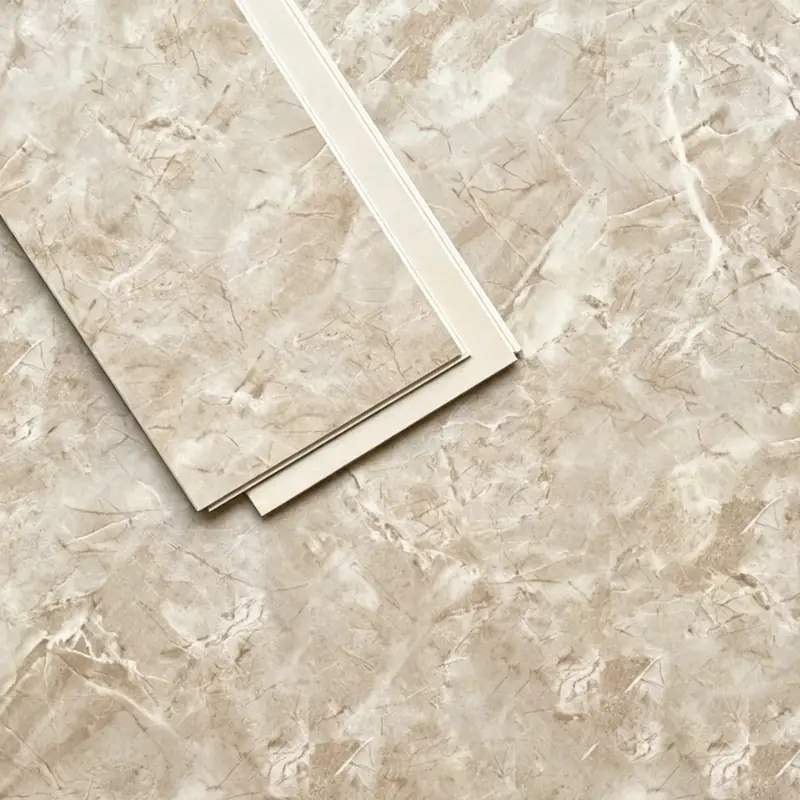
Stone Pattern SPC Flooring ist eine strapazierfähige und wasserdichte Bodenlösung, die das natürliche Aussehen von Stein nachbildet und eine stilvolle und praktische Option für moderne Innenräume bietet.

Vorteile:

  • Realistische Steinoptik mit elegantem Design
  • 100 % wasserdicht, ideal für Küchen und Badezimmer
  • Hochbeständige und stabile SPC-Kernstruktur
  • Scratch-resistant and impact-resistant for high-traffic areas
  • Einfache Klickmontage, spart Zeit und Arbeitsaufwand
  • Geringer Wartungsaufwand und einfache Reinigung
  • Available in various colors and textures

Fehler: Kontaktformular wurde nicht gefunden.

Categories ,

Was ist SPC-Bodenbelag mit Steinmuster?

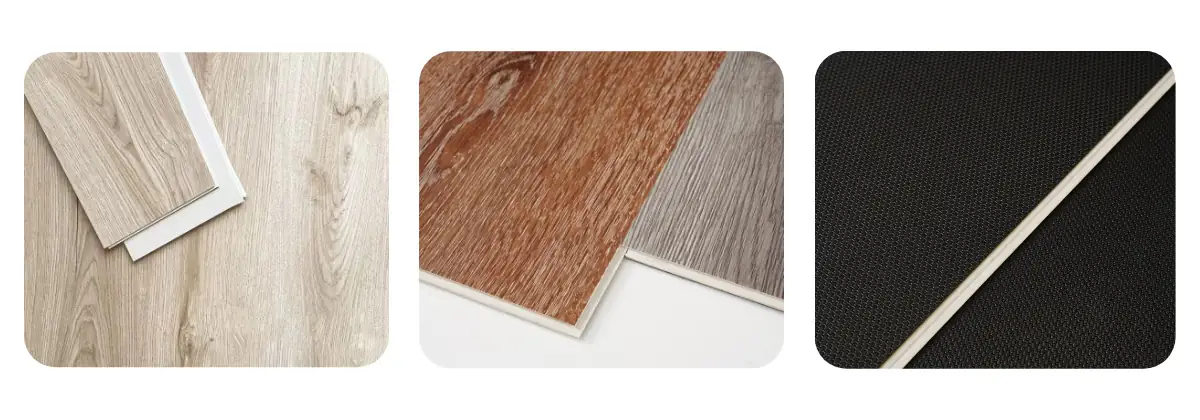
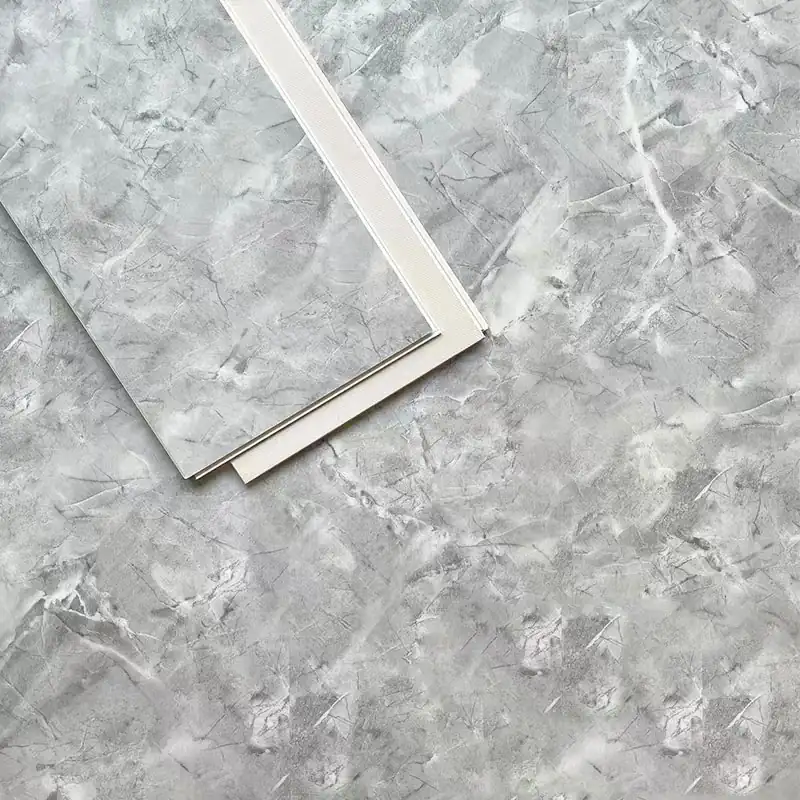
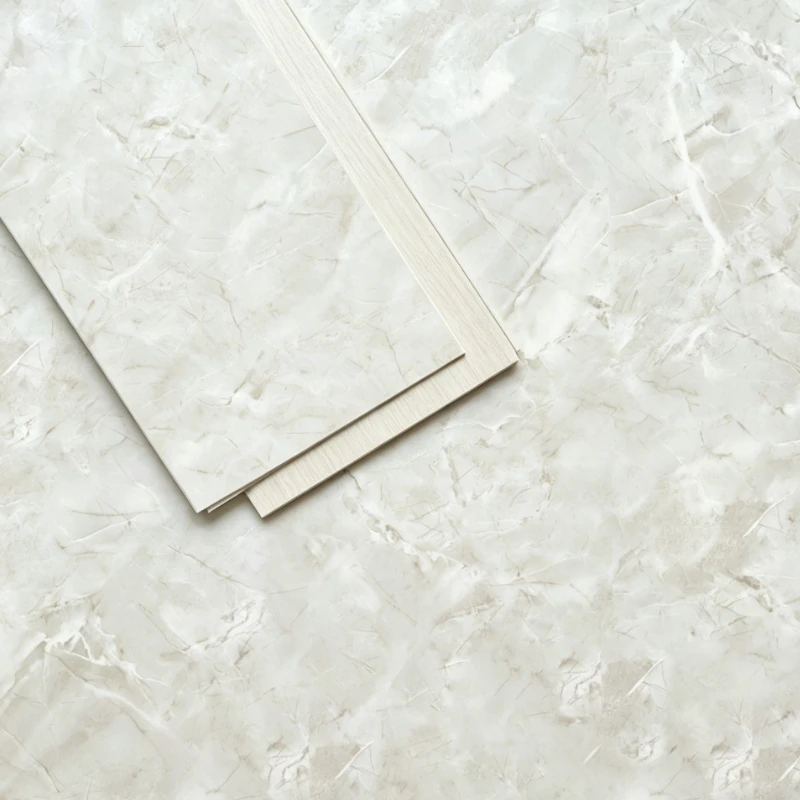
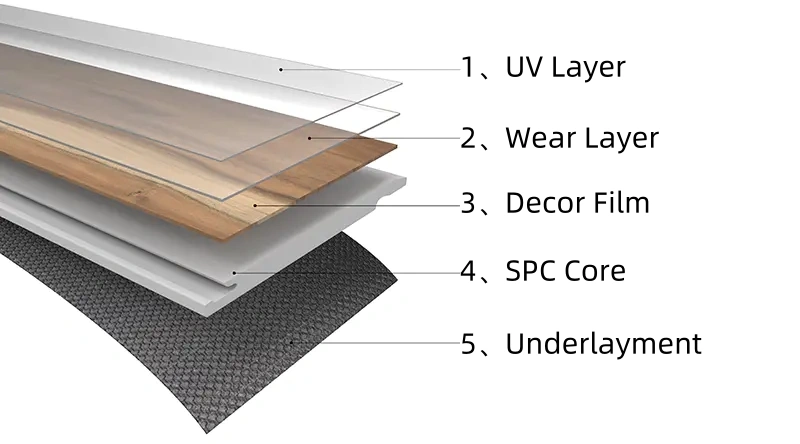
Stone Pattern SPC-Bodenbelag ist ein hochleistungsfähiger, starrer Kernboden, der das natürliche Aussehen von Steinmaterialien wie Marmor, Schiefer und Beton nachbildet. Er besteht aus einer Kombination von natürlichem Kalksteinpulver, Polyvinylchlorid (PVC) und Stabilisatoren und bildet so eine dichte und langlebige Struktur.

Im Vergleich zu herkömmlichen Steinböden bietet dieser SPC-Bodenbelag eine praktischere Lösung: Er ist leichter, einfacher zu verlegen und benötigt weniger Pflege. Er vereint realistische Ästhetik mit hoher Leistungsfähigkeit und ist somit die ideale Wahl für moderne Wohn- und Geschäftsräume.

Realistischer Steineffekt, Steinmuster, SPC-Bodenbelag


Produktspezifikationen

Element Parameter
Material Stein-Kunststoff-Verbundwerkstoff (SPC)
Dicke 4 mm / 5 mm / 6 mm / 8 mm
Trageschicht 0,2 mm, 0,3 mm, 0,5 mm, 0,7 mm, 1,0 mm
Größe 6”×48” (150×1220mm)
7”×48” (182×1220mm)
9”×48” (230×1220mm)
9”×60” (230×1525mm)
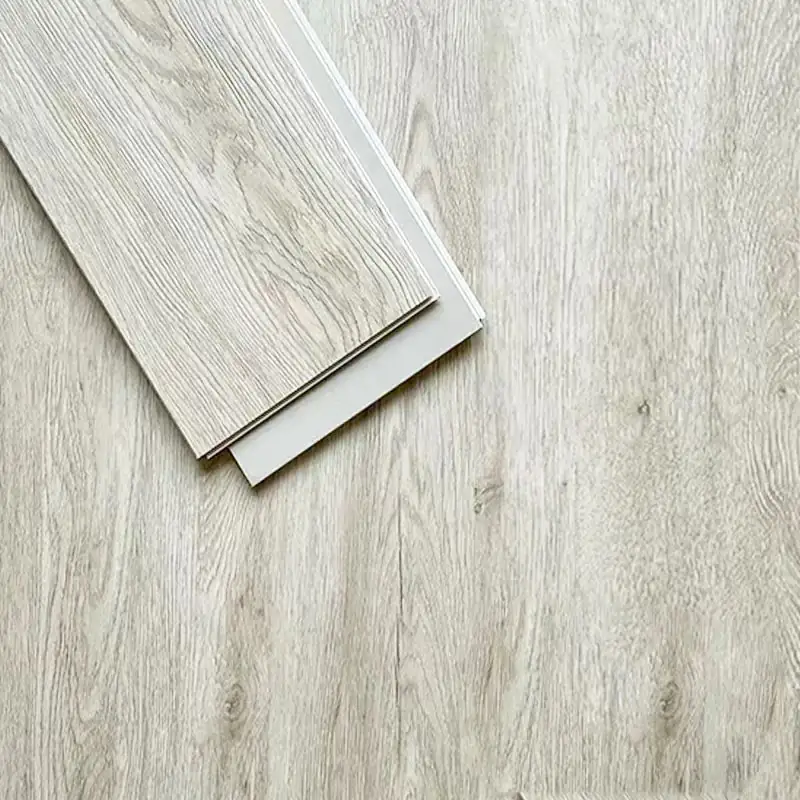
Oberflächenstruktur Holzmaserung / Marmor / Teppich
Installation Click Lock System
Anwendung Zuhause, Büro, Geschäft, Hotel, Schule

Die Struktur von SPC-Fußböden mit Steinmuster

  1. UV-Schicht (UV-Beschichtung): Die oberste UV-Beschichtung schützt die Oberfläche vor Kratzern, Flecken und Ausbleichen. Sie verbessert zudem die Abriebfestigkeit und erleichtert die tägliche Reinigung, sodass der Boden sein ursprüngliches Aussehen behält.
  2. Nutzschicht: Die Nutzschicht bietet einen starken Schutz vor Abrieb, Stößen und starker Beanspruchung durch Fußgängerverkehr. Eine dickere Nutzschicht gewährleistet eine höhere Strapazierfähigkeit und verlängert die Lebensdauer des Bodenbelags.
  3. Dekorfolie: Diese Schicht verleiht SPC-Böden ihr realistisches Aussehen, beispielsweise in Holz-, Stein- oder Marmoroptik. Hochauflösende Drucktechnologie ermöglicht natürliche und stilvolle Designs für verschiedene Einrichtungsstile.
  4. SPC-Kern: Der SPC-Kern bildet die Hauptstrukturschicht und besteht aus Kalksteinpulver und PVC. Er bietet hervorragende Steifigkeit, 100%ige Wasserdichtigkeit und hohe Dimensionsstabilität und verhindert Ausdehnung oder Verformung.
  5. Unterlage: Die optionale Unterlage verbessert den Gehkomfort, reduziert den Geräuschpegel und optimiert die Wärmedämmung. Sie gleicht zudem kleinere Unebenheiten im Untergrund aus und erleichtert so die Verlegung.
SPC-Bodenstrukturschichten

Wichtigste Merkmale

Realistische Steinoptik

Dank hochauflösender Drucktechnologie bildet die Oberfläche natürliche Steinstrukturen wie Marmor und Schiefer präzise nach.

100% wasserdicht

Absolut wasserbeständig und daher ideal für feuchtigkeitsgefährdete Bereiche wie Küchen und Badezimmer.

Langlebig und stabil

Die starre Kernstruktur verhindert Ausdehnung und Zusammenziehen und gewährleistet so auch bei starker Beanspruchung langfristige Stabilität.

Einfache Installation

Ausgestattet mit einem Klick-Verriegelungssystem, das eine schnelle und problemlose Installation ohne die Notwendigkeit von professionellem Werkzeug ermöglicht.

Geringer Wartungsaufwand

Benötigt nur minimalen Pflegeaufwand und kann problemlos mit herkömmlichen Haushaltsreinigungsmethoden gereinigt werden.

Umweltfreundlich und sicher

Hergestellt aus umweltfreundlichen Materialien, frei von Schadstoffen und sicher für Innenräume.

Vorteile

  • Bietet eine kostengünstige Alternative zu Natursteinböden
  • Leicht und einfacher zu transportieren und zu handhaben
  • Reduziert Installationszeit und Arbeitskosten
  • Bietet eine lange Lebensdauer mit gleichbleibender Leistung
  • Verleiht Innenräumen einen modernen und eleganten Look

Anwendungsbereiche von SPC-Fußböden mit Steinmuster

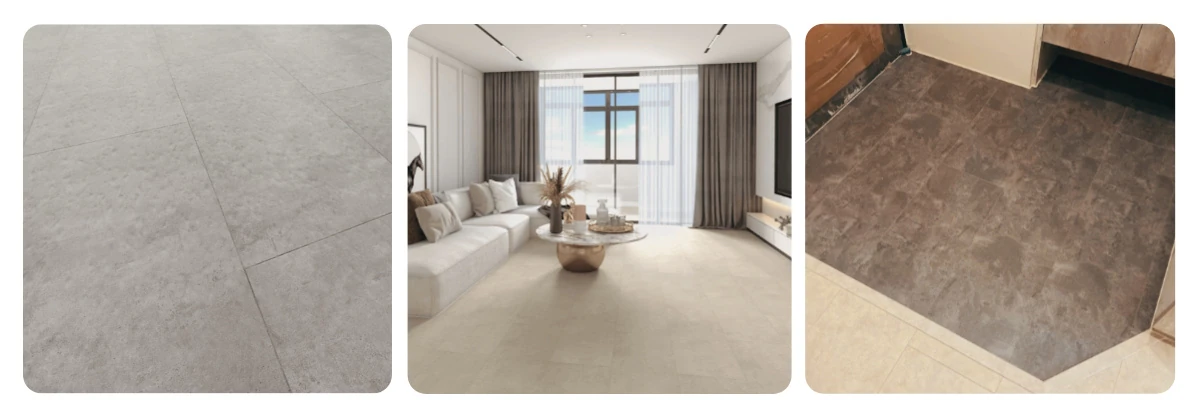
SPC-Bodenbeläge in Steinoptik werden aufgrund ihrer Langlebigkeit und Vielseitigkeit in unterschiedlichsten Bereichen eingesetzt:

  • Wohnzimmer und Schlafzimmer
  • Küchen und Badezimmer
  • Büro- und Geschäftsgebäude
  • Hotels, Restaurants und Einzelhandelsgeschäfte
  • Bereiche mit hohem Publikumsverkehr, die strapazierfähige Bodenbeläge erfordern

Installationssystem

SPC-Bodenbeläge in Steinoptik lassen sich dank eines Klicksystems einfach verlegen. Für optimale Ergebnisse muss der Untergrund vor der Verlegung sauber, eben und trocken sein.

Zu den grundlegenden Installationsschritten gehören:

  1. Bereiten Sie den Unterboden vor und reinigen Sie ihn.
  2. Messen und planen Sie das Layout
  3. Die Dielen mithilfe des Klick-Verriegelungssystems montieren.
  4. Sorgen Sie für dichte Verbindungen zwischen den Paneelen.
  5. Komplette Fertigstellung mit Zierleisten und Zubehör

Warum sollten Sie sich für uns entscheiden?

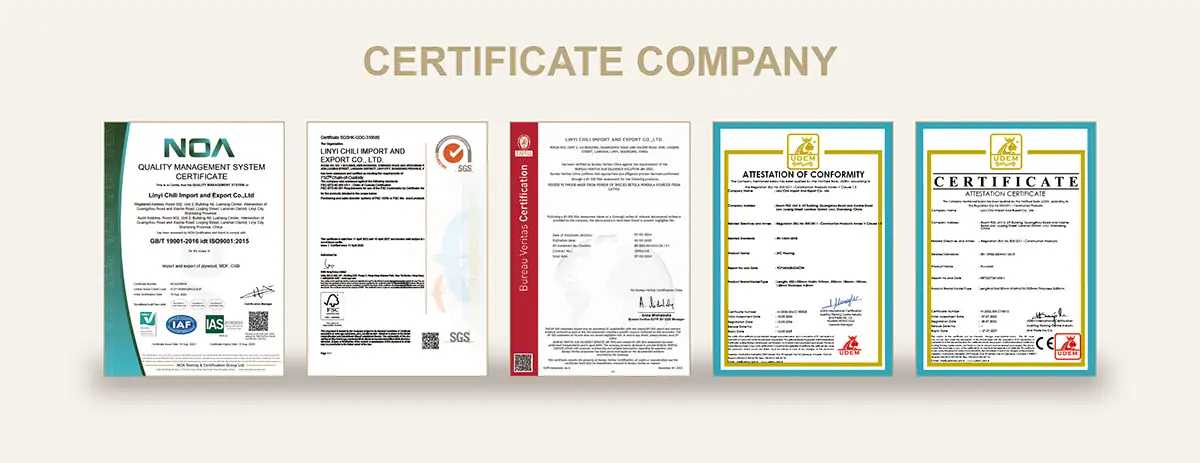
Wir bieten hochwertige Bodenbelagslösungen, die durch strenge Qualitätskontrollen und eine stabile Produktionskapazität abgesichert sind. Unsere Produkte entsprechen internationalen Standards und eignen sich für eine Vielzahl von Wohn- und Gewerbeprojekten.

Mit Fokus auf Langlebigkeit, realistisches Design und langfristige Leistungsfähigkeit wollen wir zuverlässige Produkte liefern, die Innenräume aufwerten und den Anforderungen des globalen Marktes gerecht werden.


Firmenzertifikate

Häufig gestellte Fragen (FAQ)

Um welche Art von SPC-Bodenbelag handelt es sich?

Dieser Bodenbelag verfügt über eine starre Kernstruktur und ist so konzipiert, dass er natürliche Steinoberflächen wie Marmor, Schiefer und Beton nachbildet. Er kombiniert ein realistisches Aussehen mit hoher Strapazierfähigkeit.

Is it suitable for high-traffic areas?

Ja, es bietet eine ausgezeichnete Beständigkeit gegen Abnutzung, Kratzer und Stöße und ist daher ideal für Wohn- und Gewerberäume mit starker Publikumsfrequenz.

Kann es auf Betonböden verlegt werden?

Ja, es kann direkt auf Beton installiert werden, sofern die Oberfläche vor der Installation eben, sauber und trocken ist.

Wie reinigt und pflegt man es?

Es benötigt nur minimalen Pflegeaufwand. Regelmäßiges Fegen und gelegentliches feuchtes Wischen genügen, um es sauber und in gutem Zustand zu halten.

  1. TOOLS NEEDED
    • Double-sided mallet
    • Tapping block
    • Utility knife
    • Vinyl plank cutter (optional)
    • Knee pads
    • 3mm spacers
    • A pencil
    • Measuring tape
    • A level
    • Carpenter’s square
  2. PLANKS NEEDED TO COMPLETE YOUR PROJECT Measure the length and width of your room. If the room has alcoves or offsets, measure these separately. This will give you the square footage of the room. Purchase a minimum of 10% extra to cover mistakes, trimming and for future needs or replacement. Most installations require about 10% overage. However, this can vary depending upon the room size and layout. Do not install over Carpet or Carpet Pad. This product is not suitable for any outside use, sunrooms, solariums, or saunas. Exposure to long-term direct sunlight can cause damage to your floor.
  3. PRIOR TO INSTALLATION CHECK THE PLANKS BEFORE INSTALLING THEM TO BE SURE OF APPEARANCE Colour, shade or texture variations between samples, print colour photography & the actual material are not warranted. Mix & install planks from several different cartons to minimize shade variations. Planks should always be inspected for any dye lot variations. We will not warrant that different dye lots will match each other. We maintain strict quality control at the factory, but it is a good idea to check each plank for blemishes or flaws.ACCLIMATE Flooring BEFORE INSTALLATION You must place vinyl horizontally in the room where it will be installed for 48 hours prior to installation. Maintaining an optimum temperature between 16°C to 27°C and a humidity range of 30-50% is recommended during installation and life of floor. Do not remove the planks from the case during this acclimation period
  4. SUBFLOOR PREPARATION The subfloorsurface must be smooth, flat dry, clean, and solid. Carpetstaples or adhesive residue must be removed to ensure proper installation. Subfloorsshould be flat within a tolerance of 4.8mm per 3m. Any unevenness over 4.8mm must be sanded down or filled with a floor leveller. Voids or humpsin the subfloor will prevent vinyl from locking properly. Subfloors must be carefully checked for moisture problems. Any moisture problems need to be addressed prior to installation. New concrete floors need lo cure for a minimum of 60 days.
  5. MOISTURE & TEMPERATURE It is the contractor’s as well as the installer’s responsibility to test all concrete substrates, both new and old, for moisture content to determine if it is sufficiently dry to install flooring. – Maximum level per CaC1 test method is 2.27kg/453.6kg in 24 hours. – Maximum level for ASTM2170 i-SITU Relative humidity test method is 85%. – Relative humidity levels should never exceed 85%. Moisture will not damage the flooring, but it can get in walls & structure of the home and create an unhealthy environment. NOTE: SPC Flooring does not warrant or guarantee unsatisfactory installations due to the presence of excessive alkali, moisture, or hydrostatic pressure in subfloors. SPC floors have good thermal resistance characteristics; however, they are not designed for prolonged exposure to high temperatures.

    Here are a few points to consider:

    1. Temperature Limits: Most SPC flooring manufacturers recommend avoiding exposure to temperatures above 27-30 degrees Celsius, as this can lead to deformation or damage to the material.
    2. Installation Issues: When installing SPC flooring, it’srecommended to adhere to the temperature guidelinesto avoid problemsrelated to expansion and contraction of the material.
  6. OVER HYDRONIC RADIANT HEAT Flooring can be Installed over Hydronic radiant heat if the following guidelines are followed: – Complete system must be operational for a minimum of one week.- System should be turned off 72 hours prior to installation of Aquarius flooring and remain off 72 hours after installation is complete. – Turn system back on to its normal room temperature setting.- The subfloor surface must never exceed 30°C throughout the life of the floor. – Flooring and adhesive should never come in direct contact with heating system.
  7. UNDERLAYMENT The Flooring (If does not have attached pad) can be installed over approved dense sound underlayment. Must tape seams with waterproof duct tape. Do not use any additional underlayment if Flooring already has attached underlayment.
  8. INSTALLATION
    1. Start in a Corner: Begin in a corner of the room, placing spacers between the wall and the first plank to maintain an expansion gap.
    2. Laying the First Plank: Carefully align the first plank and gently tap it into place using a rubber mallet and tapping block.
    3. Continue Adding Planks: Install the next plank by angling it slightly and snapping it into the groove of the first plank. Continue this process, ensuring each plank is firmly in place.
    4. Cutting Planks: Measure and mark where cuts are needed. Use a utility knife to score the plank and then snap it along the line. A fine-tooth saw can also be used for complex cuts.
    5. Stagger the Seams: Make sure to stagger the seams by at least 6 inches between adjacent rows for a more natural and stable floor.
    6. Fitting Around Obstacles: When reaching obstacles like door frames or pipes, measure and cut the planks to fit. Always leave a small expansion gap around these areas.
    7. Final Row: For the last row, measure the gap and cut the planks to fit. It might be necessary to use a pull bar to snugly fit the last row of planks.
    8. Finishing Touches: Once all planks are laid, remove the spacers. You can add baseboards or quarter-round molding to cover the expansion gaps and enhance the room’s appearance.
  9. BASIC CLEANING Once all traces of adhesive have been removed, the floor should be dry vacuumed to remove all dust and loose debris. Damp mop as needed using clean water and diluted Ph. Neutral cleaner in cool water or ready to use spray cleaner that will not leave a residue. Do not use harsh cleaners or chemicals on floor. Do not use abrasive scrubbing tools, detergents, caustic cleaners, abrasive cleaners or „mop and shine“ products. After 5-10 minutes, all dirt and residue of the cleaning agent should be removed; the floor should be rinsed with a damp mop and allowed to dry. Overtime floors may begin to lose their lustre and may require an application of floor polish. When and where you apply the floor polish will depend on the traffic the floor receives.

Related Products

Wood grain SPC flooring natural oak texture surface
SPC-Bodenbelagsausstellung mit moderner, wasserfester Oberflächenbehandlung